Friday, December 30, 2011

Tutorial - easy shirred baby dresses

I wanted something special and handmade for my daughter's first Christmas so I drafted up a simple dress pattern. As complicated as they look they are really quite quick and shirring is totally addictive!

This is the tutorial for the shirring and it worked a treat. My only issue (that was ongoing for about an hour before I face-palmed at my oversight) was that the elastic in the bobbin was not feeding correctly, the elastic was pulled out of its little niche in the bobbin holder and this caused the elastic thread to bunch up on the underside of the fabric. Once I kept an eye on the bobbin, ensuring the thread was in place the shirring went like a breeze.

I kept my thread length at about 2 and had my bobbin tension around 2.5 on my Janome MyExcel machine. It took very little practise to find the thread length and bobbin tension that worked best.

I made 7 dresses in total and an extra top for Christmas day. The top is a little different and a bit fancier but once you have made the basic dresses, you will see how the top was made. The first dress was a bit long, my daughter is only nine months and not walking yet so I didn't want something that would catch her legs. My first attempt was also too slim. It fit fine in the chest but it was not roomy enough to accommodate a nappy bum!


Back of the Christmas top


Just click on the tutorial picture and save to your computer - or Pin it!


We would love to see your dresses, please post us a link if you make your own!

Thanks :)
Nikki

Thursday, December 29, 2011

Friday is Family Fun Night at the "Crafted" House.


One of the biggest things I wanted as a child was family dinners. I just loved the idea of a huge table, everyone gathered, sharing stories of their day, jokes they might have heard, goals and dreams they might have planned. The idea was so magical to me.

When we had Megan (my crafted mini me) I would bring her out and lay her in her reclining highchair. Even if she was asleep we would bring her out, sit her next to us at the table while my husband and I ate and chatted about our day. We did this from birth with all of our kiddies and our dream was to always have these family meal times. But as kiddies grow older and my husband became such an important computer fixer, they started having these social, spiritual or sport commitments and next thing I knew 7 nights of family dinners had turned into 3 or 4.

To keep the dream alive (so to speak) and to dedicate set time for family fun we created Friday Family Fun Night. A night to enjoy together, it didn't matter where we were or what we were doing, it just mattered that we were doing it together and having fun. Sometimes we would go out, sometimes we would grab a pizza and watch a movie but lately my daughter has been having a lot of fun with "Megan's Restaurant"

Here's how it works. We pick a country or cuisine that we would like to try and my daughter and I research until we find a yummy menu. Then we make our shopping list and go on the inevitable treasure hunt for obscure ingredients. This - for us - is half the fun for Family Fun Night.

On the Friday I will pick her up from school and she will come bouncing home - so excited for "Megan's Restaurant". I'll be busy cooking in the kitchen and she will be setting the table - including name tags, "fancy" glassware and plates, serving platter (if needed) organising the bread and the drinks - all the fancy tasks of a restaurant manager :-)

This Family Fun Night we will be having a Brazilian feast.

Brazilian Black Bean Stew recipe found here
Brazilian White Rice recipe found here
Päo De Queijo (Brazilian Cheese Bread) recipe found here
Brazilian Lemonade recipe found here

And for dessert, a Lime Pie recipe found here. Now looking at the recipe it does say Key Lime Pie but we can't get Key Limes here in Australia, so really it will be a Lime Pie. Key limes are quite different to our limes, when they are ripe they have a pale green to yellow skin, they are also smaller then the limes we are used to and have a stronger tartness.

Tonight I will post some photos of our Brazilian Feast.

Until then Happy Crafting
From Natalie at Crafted by Natalie.


Monday, December 26, 2011

Apple Valley Creations Giveaway


I think many crafty Mums these days are searching for ways to make a bit of money or even make a living while enjoying the luxury of being able to stay at home with their children. I love to craft things and take part in way to many forum based craft swaps for my own good, but recently I decided that I should at least put myself out there with the hope of selling some items. I am lucky enough to have a local shop that stocks all sorts of vintage and handmade items. The owner kindly agreed to stock items for me and pay me on a monthly basis when anything sells. I also have a facebook page, where I'm hoping to make contact with people from a bit further afield and today, I reached 50 likers!!!!! And as I promiced from the start I'm having a giveaway to celebrate!
You have the oportunity to win this pink owl set - a phone sleeve and a coin/cards purse, including postage. I'm happy to post in Australia or internationally so you can all enter.
What to do:
1. Go to my Apple Valley creations facebook page: http://www.facebook.com/pages/Apple-Valley-Creations/116218085133007
2. Like the page (if you don't already)...
3. Comment below answering the following Questions: Did you make or buy anything handmade this Christmas? What was it?
I will be using a random number generator to pick the winner. I look forward to reading about your handmade Christmas. Draw will be on 1st January 2012 at 8pm EDT (thats Sydney, Australia time). The second bonus is that I'm planning on having a 100 likers competition, so every new person who likes my page brings us one step closer to the next giveaway!
Good luck with the competition and all the best if you too are trying to put yourself out there as a handmade business. - Nilmerg / Elaine

Sunday, December 25, 2011

Merry Christmas from your resident Budget Blogger Steff

Wishing all our lovely readers a fantastic Christmas and a safe, properous and happy new year!!!!
I hope to see some photos of Christmas ornaments and centrepieces inspired by my previous blog posts.

Here are some more pictures of Centrepieces I have made for my home, based on the tutorials previously posted:


May you all enjoy opening presents, having yummy Christmas dinners and most importantly spending lots of quality time with loved ones.

Saturday, December 24, 2011

Merry Christmas from all at Hand Made-n's

Have you aimed for a handmade Christmas? Are you still crafting for Christmas? Did you finish it all yet? Or will you still be crafting when Santa arrives tonight?!
So with Christmas just around the corner, I feel the pressure building. While I love giving handmade gifts for Christmas, I'm just not finished!!!!! I managed to get all the gifts done for others, but the applique t-shirts for my daughters are still only half done (although I'm very happy with how they are turning out) and I've only made one of the 3 fabric world globes that I need to, I'm wondering if I will get finished in time. And then there is the skirt that is half done that I had intended to wear tomorrow, but I think that may remain unfinished until another day! And to top it all off, I've run out of wrapping paper, so the kids and I are off to brave the shops and try to pick up some more! My unfinished projects:
On the other hand, projects that I have completed are:
- Roll up chalk mat for DD2
- Applique caterpiller t-shirt for Friend's daughter
- Applique flower t-shirt for another friends daughter
- Superman Applique t-shirt for SIL
- 3 commissioned I-spy bags (and a 4th one for a birthday!)
- 2 x 18" cushion covers for my Mum & Dad
- A 16" cushion cover for each of the in-laws
- one 18" fabric globe (I'm really hoping to get the other 2 finished today!)
- a chalkcoard scrap t-shirt for DD1 and DD2
- a Dino stuffy for nephew
- Bags of reindeer noses for various friends
- Oreo truffles and oreo cupcakes (still to be packaged and delivered today!)
So all in all, while I'm feeling very overwhelmed with what I still have to do, writing this list has really helped me see what I have achieved. So if you are a bit overwhelmed with christmas, as well as writing the 'to do' list, maybe you should write a 'done' list too, it might make you feel a bit better too!
Have a good one, Nilmerg / Elaine

Friday, December 23, 2011

Foody Friday - Christmas Sweets

For the last Foody Friday before Christmas Im going to share some quick sweets.


OREO TRUFFLES
(this recipe was given to me by a friend so I don't know the original source)
2 packets Oreo biscuits
250g Philli cheese

Using a food processor or blender, blend biscuits with cheese.
Roll into balls.
Set in fridge.
Coat in melted chocolate.
Set in fridge.

You can decorate these to look like mini puddings


CHOC DIPS
Choc coat or half coat the following
Pretzels
Fruit
Marshmallows
Candy canes
Potato chips


WHITE CHOC & PEPPERMINT OREOS
Coat oreos with white chocolate, sprinkle crushed candy canes on top. Refridgerate until set


Have a safe & happy Christmas

Sally

Wednesday, December 14, 2011

Reindeer noses - an inexpensive but cute gift


Hi All, Nilmerg here. Christmas is fast approaching and at 8:30 this morning, I realised that my daughter was going to her last day of preschool for the year. I get on really well with the wonderful teachers and other staff at the Preschool so I was wishing I'd made them something. Then I had a brain wave, why not make them some reindeer noses (inspired by the ever inspiring pinterest)!
What you will need:
1 bag maltesers
1 bag jaffas
small ziplock or cellophane bags
1 sheet of Christmas coloured card
glue & stapler
Ok, so first thing you need to know, there are 9 Reindeers. I know, I googled it and wikipedia told me (http://en.wikipedia.org/wiki/Santa_Claus)!
So you will put into a bag 8 maltesers for the 8 normal reindeer (that's Dasher, Dancer, Prancer, Vixen, Comet, Cupid, Donner and Blitzen) and one red jaffa nose for good olde Rudolph. Making a huge investment total of 9 lollies per bag. Seal the bag.
Cut your Christmas coloured card into pieces as wide as your bag an at least 3" long. Fold the card in half (so it remains the length of the bag.
Go to your word processing or art programme and find a cute clip art image of a reindeer and a cute font. Combine to form a small sticker sized image and print, see below. (If you don't have access to a computer or printer and you are artistic you could draw and write the labels)
I then chose to rip my little sticker sized descriptions from the paper in an artistic fashion. You could use scissors or even some of those fancy scrapbooking scissors to get a different look.
Glue the cut / torn out piece to the front of the card, then fold it over the top of the bag and staple into place.
And guess what! You are done!!!!!!
The 3 teachers in my DD's classroom were thrilled with their gifts. I think that they appreciated that there had been more thought put into it than just a box of chocolates.
I'll be using this quick and easy gift for all those people who you feel that you ought to give a gift to, but don't want to spend a whole heap of money on. Like the neighbours kids, or your work colleagues kids (or maybe even your work colleagues!), teachers, teacher's aides, acquaintances from playgroups, as a sweet extra treat for those friends children who are not allowed too many lollies, children at your church or community group, and the list goes on.
I hope I've provided you with a quick, easy and inexpensive gift that might come in handy this season. If I don't blog again before the big day, Merry Christmas.
Nilmerg / Elaine

Monday, December 12, 2011

It's time for a giveaway!


Along with Sew, Mama, Sew! Hand Made-n's are joining in the giveaway spirit. This competition is open to international entrants!


 8 x 10 (20 x 25cm) Matroyshka art print. Digitally printed and ready to frame in a standard 8 x 10 photo frame (print only, frame not included). This print will be posted in a firm cardboard envelope so it doesn't get squished in the mail :)
Courtesy of Eveningsong Ink


To enter, please answer the following question in the comments field below. Remember to include your email so I can contact you if you win!

Q: What type of handmade gift would you most like to receive this Christmas? 

The winner will be chosen by random on December 17, 2011 11am (Brisbane, Australia EST. That's December 16, 2011 5pm PST). I know that's confusing! The winner will be notified by email within an hour of the draw and is required to respond with their address within 48 hours of notification or a new winner will be chosen.

We can't wait to hear from you, please share our page with anyone you know who loves Matryoshkas as much as I do :)

Thursday, December 8, 2011

Christmas Love Birds

These simple to sew Christmas birds add a traditional touch to any Christmas decorating; they also make a great gift for newlyweds celebrating their first Christmas together, or why not make some smaller birds as well for couples with a new baby. But don’t just limit these birdies to Christmas! Whip them up in some fun fabrics for sweet little decorations all year round! ~Caitlan


You will need:
·         1 fat flat in your choice of fabric
·         Matching Thread
·         Doll needle (this is basically a very long sewing needle)
·         Four large, two hole, buttons
·         Matching or complementary DMC thread
·         Four black beads suitable for eyes
·         An outline of a bird with a wing, a Google search for “simple bird outline” will bring up heaps of outlines (remember to respect copyright) or simply draw your own. Your bird should have a little wing.

·         Ribbon
·         Stuffing: polyfibre fill, fabric scraps, whatever you can get your hands on.

1.       Cut out four bird shapes and 8 wing shapes, allowing a seam allowance. The easiest way to do this is to pin your fabric, right sides together and trace 2 birds and 4 wings, cutting them out through both layers of the fabric.

2.       Make a loop out of your ribbon and pin it between two bird shapes, making sure the fabric is right sides together and that the loose ends of the loop are sticking out. Stitch around bird, leaving a small opening in the base to stuff. Don’t forget to clip the curves!

3.       Right sides together, stitch each of the wings together. Leave a small gap to stuff. Don’t forget to cut the curves!
4.       Turn pieces right side out and stuff. Use a ladder stitch to close the holes.

5.       Take the wings and work out where you want to attach them, you might like to make a little mark on each side to help you get them straight.

6.       With your doll needle push one piece of long DMC thread through your first button hole, the wing, the birds’ body, out through the second wing and through the button on the other side. Repeat this through the second button whole with another piece of DMC thread. Knot the thread as tightly as possible and tie a bow, trim the thread.

7.       Stitch on the birds eyes.

8.       Your bird is now ready to hang!

Variations: Personalise your gift by embroidering a monogram or date on the bird! Decorate your bird with embroidery, beading or other embellishments. Use a different fabric for the wings that contrasts with the body.
A note on the gift wrap: This nest is made out of wood shavings, made with a plain from another project. Just put the shavings in a box and nestle your birds inside. You could put some cute little objects through the shavings to make your nest like a bower birds!

Wednesday, November 30, 2011

Centrepieces for Christmas on a Budget


Ever wanted a stunning centrepiece for the Christmas table but baulked at the prices? Follow my simple tutes and create your own - there by saving money and having the feeling of achievement at making your own table look beautiful.

You can use all or some of these ideas, I think they look magnificent together but it's entirely personal choice.

Basic materials list:
Tinsel
Glitter and/or glitter paint
Pine cones
Candles
Newpaper/dictionary pages/wrapping paper or other thin paper
Double sided tape
Paint
NB Please note you do not have to have all this, choose what suits you


Methods:
Pine cones -

With the pine cones, I chose to do a couple of different methods, but these are open for further ideas. If the pine cones you've found have damage like this: don't despair. You can always turn the damage towards the back or, if the damage is quite bad, use a ribbon or similar embellishment to disguise the damage.

In method one shown on the left,  I chose to go with the non-traditional colour of blue mixed with a little green to make a lovely blue-turquoise colour. I then painted the Black Opal glitter paint over the top in places as a highlighter rather than covering all the blue paint.

In method two in the middle, I painted a plain pinecone in Black Opal glitter paint - this is kind of a clear paint so it kept the natural colour of the pine cone while adding a bit of glitz.

In method three on the right, I used a red paint and red glitter for a traditional look on the pine cone. If you like traditional colours, you could choose to do one in silver and one in green.

Other methods you might like to try out are using thin tinsel, pom poms (home made or bought), miniature Christmas decorations, small pieces of holly.


For the candles, I also did a couple of other methods:

For the first method on the left, I wrapped some old Christmas-themed wrapping paper and trimmed to size, before double sided sticky taping it onto the candle. I did not attach the paper to the candle, but overlapped the paper so the paper can be slid off the candle easily - this means you can move the paper and trim accordingly as the candle burns down, or remove it completely to use the candle for another purpose.

For the second method on the right, I recommend using a thin paper such as wrapping paper, dictionary or old book pages, newspaper etc. Wrap the candle and adhere together with sticky tape. You can leave it as is, as I have done, or you can then use a hair dryer to gently melt the candle onto the paper for an almost transparent effect.


For the third method in the second left photo, I used the double sided sticky tape to create lines around the candles - I eyed the spaces in between each line. I then gently patted glitter onto the tape, being careful to brush away stray bits with a paint brush.
For this method, I recommend using a thicker style of glitter than I used, as the extra fine glittery can get very staticky and stick to everything and can be difficult to remove. Also check to see how sticky the wax on the candle is, as it is quite humid where I am today the candle was a bit stickier   than usual.


When I was satisfied with my pine cones and candles, I played around with them until I found a setting I liked.As you can see in the below pictures, the candles and pine cones look effective separately, but I think look that little bit more festive when done together.

I used some old boxes to put the candles on, placed the pine trees in front balanced on a box and each other to ensure they sat up straight. I then placed the tinsel around them to hide the boxes and to add that bit of Christmas cheer.

I hope you like my Centrepieces of Christmas on a Budget - stay tuned for my next article coming soon. Also feel free to leave a comment if there's any ideas you'd like to see posted here.

Happy crafting,
Stefanie

Saturday, November 26, 2011

Favourite Places-The Needlecraft Emporium and Fabric Cave at Crowle Home

If you are like me, you love to pop into your favourite (or local) opshop and see what fabric or crafty things they have on that bookshelf down towards the back of the store. Sometimes you strike it lucky finding some gorgeous buttons, a vintage bed sheet, a few balls of yarn, maybe a magazine you've never seen or a retro clothing pattern that you have just the right fabrics to make that up in at home. (Once I found a complete unused Gocco Printing Set for $15! SCORE) After happily forking over your money for said lucky crafty finds, you may find yourself skipping happily down the street daydreaming of the loveliness you now possess and all the possibilities of what you can make.............Or maybe that's just me.
BUT sometimes you leave empty handed. Not having found anything remotely interesting,

Today I will share with you my first trip to the AMAZING crafty opshop that is The Needlecraft Emporium and Fabric Cave, located at Crowle Home in North Ryde.
The Opshop is run by Achieve Australia and is called Vintage and Value Enterprises. The money raised by the opshop goes towards helping the people who live at Crowle Home and enriching their lives. Many of the volunteers are relatives of people who live or learn at Crowle House.
It is only open Mondays and Fridays from 9am till 2pm. They are also open one Sunday a month, but check the website for which one.
I went on a Monday, and only the needlecraft emporium and fabric cave were open but if you get to go on a Friday, they also have the second hand bookshop, plant shop and preloved clothing shop open as well.
The first room I visited was the Needlecraft Emporium. All I can say is WOW. The room is filled with everything a crafty person could ever want (and more).
 Drawers full of buttons.
 Shelves Filled with lace and braids..... Are we drooling yet?
 Boxes of patterns. All sorted into different categories.
A cool vest pattern. Love. But not my size :(
 Fat quarters and smaller sized pieces of quilting fabric.
 Liberty needlework kits.

 Amazing craft books. Quilting, Dressmaking, Embroidery, Beading, applique..... the list goes on.
 More buttons
 Embroidered Linens

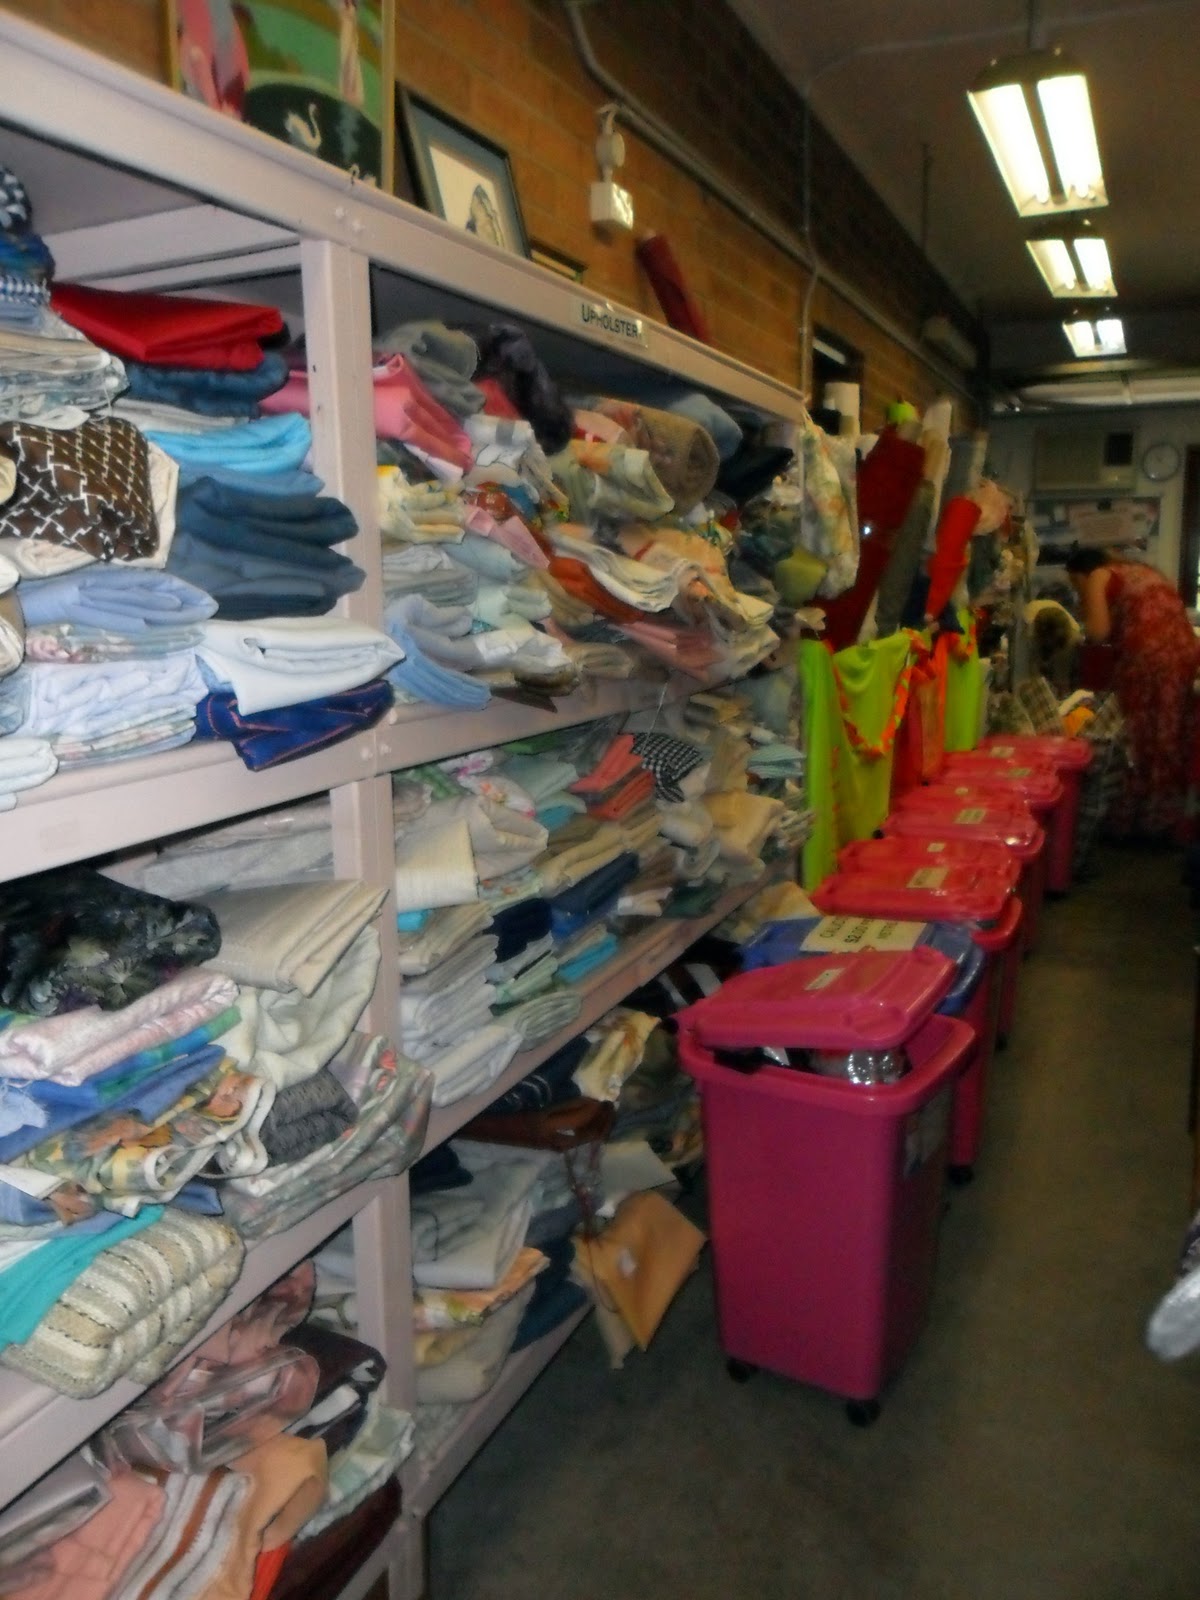
As well as beads, wool, leather, larger quilting fabric pieces, felt and sooo much more. I found the prices to be  reasonable and I bought quite a few Ondori Quilting Books for $2 and $3 each.

The fabric cave is next door and is wall to wall, floor to ceiling fabric. Most of it is colour coded as you can see below with part of the green wall. 
 Blues
 Fancy fabrics and fabric on the roll. (Metallic and Beaded are in the Bins)
All the fabric is more than a metre in length, and priced between $3-$5 a metre. I bought some cottons for making skirts.
The range of fabric is amazing, There are cottons, satins, stretch and other fabrics as well.I don't think it is possible to walk out of there empty handed.
The staff are so friendly and generous and genuinely interested in what you have chosen and what you are going to make. I hope to take a few things back with me to show them what I made.

I honestly can't tell you how much I enjoyed visiting and the pictures do not do the place justice. I could have spent much longer there (and much more money too).

So I did my happy skip back to the car, and tried to concentrate on driving home, and not on all the lovely things I just bought.

Location:
76 Belmore Street, Ryde NSW
Entry via Porter Street off Junction Street, Ryde. Street parking is available.     
Opening hours:
Monday: 9am-2pm
Friday: 9am-2pm
1st Sunday of the month: 9am-Midday

Please note there are no eftpos facilities.