It happens to us crafty people all the time, we have excess materials from our last project, that go in our stash and the chance those materials will suit the next project is so small, that these excess materials may not see the light of day for months (or even years). Real effort needs to go into losing stash weight.
As I look in what has become my craft corner I often feel a little bit of shame, evidence that a crafty person lives here is clear, but its starting to look like that crafty person may be hoarding supplies. Glancing over the stack of organised chaos I see 2 skeins of earth friendly fair trade yarn, I try and think - what on earth was I going to make with that.
I know I’ve done it several times, buying materials or ingredients for projects but never finding the time to make them up. Or even worse, forgetting that I had already had one or two of the materials at home and buying them again.
So I challenge you to join me. Take a look in your stash and lets loose some stash weight in the name of Christmas. Perhaps a Christmas Decorations, stocking fillers or even a present.
Lets see if collectively we can make a bunch of things from our stash, cutting our costs and easing the dreaded Christmas crafting rush.
Thursday, September 6, 2012
Friday, August 17, 2012
Bed side Caddy for loft beds
Loft and bunk beds have been very popular due to the their space saving qualities - in the case of loft they offer a way to have more storage or a desk in a small bedroom, while bunk beds offer extra bedding. Last year I purchased a loft bed for my room, it has a cupboard, shelving and a desk. One thing that I did not consider however, was where was I going to put things like my mobile, TV remote or other personal effects now that I could no longer reach my bedside chest of drawers?
I decided to make myself a bed caddy - I searched for tutorials to suit my bed but found none, so invented my own. Most bed caddies seem to be tucked under the mattress but since loft and bunk beds have rails, tucking it under the mattress wasn't much use to me.
I simply took a bright red pillow case, folded it in half and pinned where I wanted the pockets to me. I made them slightly different sizes so I could fit my mobile, tv remote, a small paper back and a "bits n pieces" pocket. I sewed the lines vertically from the fold. I also cut four pieces of binding tape I had lying around, I did not use specific measurements but rather placed the binding over the rail where I wanted it to sit and then guestimated the length needed. I attached each strap to the back of each pocket, and placed velcro on the front pieces, matching the velcro to the front of the pillow case. Having four straps allows the weight to be distributed evenly - I make sure I only place things in the outer pockets that will fit without me having to pull off the straps - the other two pockets can have their straps pulled off without it affecting anything. As you can see in the below picture, one of the straps has been detached from it's velcro but the other three straps take the weight.

This is a picture of a bed that is the same model as mine and I have drawn in where I placed my bed caddy. My bed was a bit messy which is why there are erased bits, but the red and blue bit is where the caddy sits.

Hope you have enjoyed reading this and stay tuned for my next post :)
Thursday, August 16, 2012
Cardi care

This is my comfy cardi. The warm one for wearing around the house. I have had this for years.

It's starting to look well worn with pilling.
It's time to do something about it.
It's time to do something about it.

You can get yourself one of these things. They have multiple names.
Usually a depiller or pill remover
Usually a depiller or pill remover

Or you can just grab one of these from your bathroom cupboard.
Whichever you choose to use, you will need to have the garment on a flat hard surface.
Make sure you hold the fabric of the garment at the same time so the fabric doesn't move.
Make sure you hold the fabric of the garment at the same time so the fabric doesn't move.
Work in small areas.
This will take quite a while if your cardi is as bad as mine but, you will be able to make it look decent once more
Sally
xxx
Friday, June 15, 2012
The Desperate housewive's quilt - Nilmerg
The Desperate housewive's quilt - Nilmerg
My contribution: the 'Button Bug'
I was invited by quiltjane to design an 8" block to be part of her desperate housewive's quilt. You can read all about her project to collect 100 blocks, 50 designed by herself and 50 from guest bloggers.
http://quiltjane.blogspot.com.au/p/desperate-housewifes-quilt.html
My block, which I have called 'button bug', was based on a design by the Handiwerx blog http://handiwerx.blogspot.com.au/2012/05/ladybug-paper-pieced-pattern.html It combines my favourite insect and my favourite crafting supply - buttons!
Since this block isn't quite 8" square, I had to adapt the pattern a little by adding extra width and height on the background.
Once that was done, I got onto the fabric choices. I decided on a cute button fabric and a blue leaf fabric for the background.


Then all that was left to do was to add the detail, legs and antenna and my button bug was all finished. I decided to use my new darning foot to add these details. It is a really fun new way to use my sewing machine.

And the finished 'Button bug' block:

I'd highly recommend this Handiworks block for a really easy and quick to put together paper pieced block. Thank you so much Jane for allowing me to be part of your project. I'd love to see what you do with all these blocks once it's complete.
Elaine Morgan 15/06/12
Sunday, May 27, 2012
Making Money from Craft Challenge.
A little while ago I found a really cool Australia Blog called http://kylieofiu.com/. I have been really inspired by some of her challenges, and have decided to make my own challenge and crafting for cash perhaps just for the month of June or perhaps longer.
Rules I am putting on myself:
A little while ago I found a really cool Australia Blog called http://kylieofiu.com/. I have been really inspired by some of her challenges, and have decided to make my own challenge and crafting for cash perhaps just for the month of June or perhaps longer.
Rules I am putting on myself:
- To start from only using items from my stash or by selling unwanted items to buy supplies.
- To account for all costs on purchases, listing fees, selling fees, commissions etc. Stash will not count as a cost for the purpose of this challenge as I have not had to buy it within the challenge period.
Here are my goals.
- To make my first non-food craft sale for the challenge period.
- To make $100 in a week.
- To make $200 in a week (not including the $100 week challenge)
- To make $400 in the month of June.
How I’m going to reach my goals.
- Its probably very important for me to note that I am a trained Baker and currently hold both NSW and ACT food business registrations and all the relevant licenses, insurance and certification to sell baked goods from my home kitchen. I do plan on selling baked goods as a part of this challenge, and I know it might seem a little unfair that I’m counting this towards my challenge but I look at it in the light that it is a craft that I do at home and my licenses, insurance and the most important (and required) certifications probably cost the same as an embroidery sewing machine or knitting machine.
- I’m also going to be using traditional crafts like Crochet, Papercraft’s, Sewing (if I can figure out my machine) and Knitting - pretty much any craft I could do to make some money.
So thats my plan. You can join my challenge if you like, changing your own rules to suit you and your craft. But if you are going to try it out with me, take it on with a knowledge that you have set down some goals you know you are going to be able to reach and then set down some higher goals that are going to stretch you. Don’t be disappointed if you don’t reach your goals, take it all in as a learning experience and enjoy the ride :)
Tuesday, March 27, 2012
Bobbin Lace Making
Hi folks
It's been a while since I've written a post but thought I would write and let you know all about my new crafting hobby - bobbin lace making! This is a lace textile made using a particular method of twisting and crossing threads with tools called bobbins and while the end result looks similar to tatting, the method itself is very different. Bobbin lace is also called pillow or bone lace, the latter because the bobbins used to be made of bone or ivory, and evolved in the 16th century Italy from braid making.
The picture below shows a partially completed book mark that includes foot side, using the Torchon style - this means it usually follows a geometric pattern, such as the diamonds and lines shown on the pattern. The bobbins are not usually tied up as mine are in the picture, this was taken after I'd started to pack up my board.
 Many people have told me this looks like a complicated craft, and I agree that it does LOOK it, however the actual technique is not very confusing at all. This particular pattern requires fourteen pairs of bobbins that have been wound in a clock wise direction on one piece of thread - rule of thumb is the thread should be 4 times the length of the pattern, you wind one end of a bobbin, apply a slip knot and leave a length of approximately 15-20cm. Using a second bobbin, wind the end of the thread (that's attached to the first bobbin) clockwise onto the secondary bobbin, leaving a 20cm gap between the bobbins on the thread. Repeat this technique for each pair of bobbins until all are done. Each pattern can have a different way of starting, youtube and google are excellent for patterns and tips.
Using a working board, the next step requires a tool which looks like a needle with a handle attached - however you can use a plain large needle but the handle is useful if you suffer from carpal tunnel etc. My pattern above had clear contact applied before I used four pins to hold it down. I then pricked each of the little black holes on it, this helps for later on when the pins are inserted to hold the lace in place while you work.
Once the bobbins are wound and are attached to the first pin you can then begin the process of the stitches. While there are several different stitches that can be moved, there are only ever four bobbins used at a time (the rest are irrelevant if not being used in a stitch) and there are only two moves, the cross and the twist - which can be done in a variety of ways to create different stitches.
For this particular bookmark I used the following stitches:
Footside: this is the edge of the piece, which run vertical down the sides.
Cloth work: the technique used to complete the diamonds, it looks like a tight weave. You can also complete this stitch using a half stitch which results in more of a basket weave look.
Ground: Stitches used outside motifs like the diamonds, this holds the lace piece together
.jpg) The below is a snake I created in my first lesson of bobbin lace using the cloth work stitch:
The below is a snake I created in my first lesson of bobbin lace using the cloth work stitch:

For those interested in joining a group around Australia, please check out:
http://lacegumnuts.com/index.php?option=com_content&task=view&id=261&Itemid=2 for more information
I hope you have enjoyed reading my quick overview of Bobbin Lace - thanks for reading!
It's been a while since I've written a post but thought I would write and let you know all about my new crafting hobby - bobbin lace making! This is a lace textile made using a particular method of twisting and crossing threads with tools called bobbins and while the end result looks similar to tatting, the method itself is very different. Bobbin lace is also called pillow or bone lace, the latter because the bobbins used to be made of bone or ivory, and evolved in the 16th century Italy from braid making.
The picture below shows a partially completed book mark that includes foot side, using the Torchon style - this means it usually follows a geometric pattern, such as the diamonds and lines shown on the pattern. The bobbins are not usually tied up as mine are in the picture, this was taken after I'd started to pack up my board.

Using a working board, the next step requires a tool which looks like a needle with a handle attached - however you can use a plain large needle but the handle is useful if you suffer from carpal tunnel etc. My pattern above had clear contact applied before I used four pins to hold it down. I then pricked each of the little black holes on it, this helps for later on when the pins are inserted to hold the lace in place while you work.
Once the bobbins are wound and are attached to the first pin you can then begin the process of the stitches. While there are several different stitches that can be moved, there are only ever four bobbins used at a time (the rest are irrelevant if not being used in a stitch) and there are only two moves, the cross and the twist - which can be done in a variety of ways to create different stitches.
For this particular bookmark I used the following stitches:
Footside: this is the edge of the piece, which run vertical down the sides.
Cloth work: the technique used to complete the diamonds, it looks like a tight weave. You can also complete this stitch using a half stitch which results in more of a basket weave look.
Ground: Stitches used outside motifs like the diamonds, this holds the lace piece together
.jpg)

For those interested in joining a group around Australia, please check out:
http://lacegumnuts.com/index.php?option=com_content&task=view&id=261&Itemid=2 for more information
I hope you have enjoyed reading my quick overview of Bobbin Lace - thanks for reading!
Monday, March 5, 2012
Circle Applique Tutorial

First - decide how big you want your circle. For my project, I needed 5inch circles (to fit in a 6inch quilt block). I have a circle template for the 5in I needed, however, I regularly use a compass to draw them or trace around whatever I can find around my house - eg. Baby formula tins, spools of thread, dinner plates.

 Cut out all your circles and place on top of the fabric you are using. Roughly cut out leaving approx 1/2in around each circle.


Pin your circle onto your project and sew!

Any questions, leave me a comment!
Kate x
-- My completed Penelope Quilt can be seen HERE
Friday, February 17, 2012
Foody Friday - Koby's Favourite Pasta Bake.
This is a quick and easy dinner that Koby loves to make.
And the best thing....... It only has four ingredients!
You will need:
500g packet of dried pasta ( we love spirals the best)
1 420g can of cream of chicken condensed soup (the cream of chicken and mushroom is yum too)
About a cup of shredded, cooked BBQ chicken or cook some chicken before hand.
About a cup of shredded cheese.
Cook the dried pasta using the instructions on the packet.
Drain pasta and combine with soup, chicken, and a third of the cheese.
Place in baking dish and cover with the rest of the cheese.
Bake in the oven at 180 degrees Celsius for 15 to 20 mins.
Chicken can be substituted for canned tuna or salmon and frozen veggies can be added when combining all ingredients.
Wednesday, February 1, 2012
Chenilling Tutorial - with a tip to help sore wrists
Hi there guys
This is my first tutorial for 2012, I hope you really like it and find it useful. This is excellent for those scrappy bits of fabric you don't want to chuck out but don't want to waste either. This technique is called Chenilling and is excellent for bags, table/place mats and could even be used in quilt squares.
Items required:
Method:
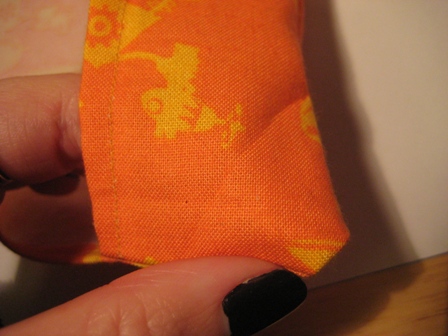
Step One: Cut your material to the same size, and sandwich the pieces together with a plain piece on the bottom. In my example, I chose black for the bottom, an orange/white for the second layer, a plain blue for the next layer, and a cute country pattern layer for the top. Line up the pieces so they are even and pin them in a sandwich.
 Step Two:
Starting at one corner, measure across the lining piece diagonally and mark. Then mark a diagonal line 1 inch on either side of the middle line. Continue this across the lining piece until it looks like the picture shown below.

 Step Four:
For this step, you will require your scissors again. To complete the step, you need to cut the top three layers of fabric (not the lining) between the lines, Carefully slide of the scissor blades in between the bottom layer and the top three layers, as shown below.


 Once you've finished cutting all of the spaces between the lines, it will look like the below picture.
 Step Five: Finally, you can either choose to leave it as the picture shows above, or you can choose to make it more raggedy by washing it and putting it in the dryer. Both have very effective results. You can either choose to roll in a hem, or you can insert it into a bag to secure the loose edges.
 Above picture courtesy of Cooma Craft Group showing the raggedy edges achieved from washing/drying
Hope you enjoy this neat little tutorial and please show me if you choose to make something following it. Thanks for reading, and tune in next time
This is my first tutorial for 2012, I hope you really like it and find it useful. This is excellent for those scrappy bits of fabric you don't want to chuck out but don't want to waste either. This technique is called Chenilling and is excellent for bags, table/place mats and could even be used in quilt squares.
Items required:
- Sewing machine (if you're really keen you could hand stitch it)
- Thread and needle suitable for sewing through several layers of material
- Fabric - this can be any fabric you like in any shape you like, as long as there are at least 4 pieces the same size. Aim to have at least one plain colour piece for the lining. I personally did a piece with 4 layers of fabric sandwiched together so my tutorial will only reference 4 pieces, however I do know someone who successfully did it with 7 layers.
- Something to mark lines with
- Ruler
- Sharp long scissors
Method:
Step One: Cut your material to the same size, and sandwich the pieces together with a plain piece on the bottom. In my example, I chose black for the bottom, an orange/white for the second layer, a plain blue for the next layer, and a cute country pattern layer for the top. Line up the pieces so they are even and pin them in a sandwich.

Starting at one corner, measure across the lining piece diagonally and mark. Then mark a diagonal line 1 inch on either side of the middle line. Continue this across the lining piece until it looks like the picture shown below.

Step Three:
Once you've completed that, using your machine (or hands) sew the first middle diagonal line, through all four layers. Continue stitching the first line on the right, then the line on the left, and stitch diagonally across so it looks like the picture below. Continue through until all the lines have been stitched.

For this step, you will require your scissors again. To complete the step, you need to cut the top three layers of fabric (not the lining) between the lines, Carefully slide of the scissor blades in between the bottom layer and the top three layers, as shown below.


I found the easiest way to hold it while cutting was to slide the blade under the top three layers, then pinch the material around the blade - as shown below. I have RSI and very sore wrists a lot, and found this method put less strain on my wrists. Try it out and please comment below if it helps you.


Hope you enjoy this neat little tutorial and please show me if you choose to make something following it. Thanks for reading, and tune in next time
Friday, January 27, 2012
Slow cooker Potato Bake
Welcome to Foody Friday, my turn to blog about something edible!
Whats a good Aussie BBQ without a potato bake. But with the weather as hot as it is, I was a little reluctant to turn on the oven and heat the house up some more. So I thought I'd try potato bake in the slow cooker. Here are the results:

Ingredients:
750g potatoes (I chose to mix normal potatoes and sweet potatoes)
1 Onion
1 or 2 cloves of Garlic
150mls cream
1/2 to 1 cup of grated cheese
1 chicken (or vegetable) stock cube
Mixed herbs
Salt an pepper
Method:
1. Peal and thinly slice the potatoes and onions

2. Crumble the stock cube into a measuring jug and add enough boiling water to disolve. Pour in the cream, salt, peper, herbs and crushed garlic. Stir to mix.
3. Layer half of the potatoes and onion into the bottom of your slow cooker bowl. Pour on half of your cream/stock mixture.

4. layer the rest of the potatoes and onions into the slowcooker bowl and pour over the remaining cream/stock mixture (don't worry if the liquid doesn't cover all the potatoes - thats ok). Cook on Auto (of high) for 2-3 hours.

5. About 30 minutes to 1 hour before you need to serve your potato bake, top with the grated cheese and replace the lid. Cook until cheese is melted and has hopefully browned a little. Then Serve!

Enjoy :) Nilmerg
Monday, January 23, 2012
What are YOUR plans for 2012?
Can you believe we are almost a whole month into 2012??
After all the excitement and busyness of Christmas we took our kids away for a week of camping and I did zero crafting... Yep, I said ZERO! Nothing, nada, zilch..
I can't remember the last time I had a complete break from everything, but it was AWESOME!
I have returned from holiday creatively refreshed and almost bursting with excitement with all the things I want to make this year! I am finding so many inspiring projects online (esp on pinterest, Facebook groups and Craftster)
Towards the end of last year, I made plans to lay off the Craft Swaps in 2012 - now here I am, almost at the end of January and I have already committed myself to 3 Craftster swaps, 5 on Swap-bot, 2 personal swaps, a Quilt Bee and 2 Quilt-a-longs! At this rate, I should be done with my 50 in 2012 (another craft-a-long) by Easter!
-- Oh, and inbetween all the crafting, I'm learning how to Blog!! Looking forward to sharing plenty of ideas, tips, tutorials and random crafty goodness here at Handmaden's in 2012.
Kate x
-- QAL linky goodness for everyone! Join me!
Monday, January 2, 2012
Fabric Book Covers
Happy New Year and welcome to 2012 at Hand Made-n's! With all the holidays over thoughts are turning back to school! Why not make this fun project for your or your children's books this year! This simple to make fabric notebook cover is great for school books, journals, sketch pads or even much loved novels. It is so simple that even a beginner could make it without difficulty.

1. Iron Your Fabric.
| |
2. Measure your book, measure the width of the front and back covers and the spine. Add approx 2.5cm to this measurement to allow for seams.
|  |
3. Lay your book on your fabric. Allow approx 8cm above and below the book. Using the measurement you took above, measure out the length needed from one edge of the fabric. Cut this rectangle of fabric out. You should have another rectangle, approx 16cm in length remaining.
|  |
4. Take the 16cm remaining rectangle and cut this in half. You now have a large rectangle for the cover of your book and two smaller rectangles that form the sleeves. Set the fabric aside.
|  |
5. If your exercise book has a bold cover that will be visible through the fabric, take a glue stick and white paper and roughly cover the bold image. A small note book will take two A4 sheets, overlapping. Note: Don’t do this to novels if you intend to take the fabric cover off! Set this aside to dry.
|  |
6. Take one of your smaller rectangles. Fold in one long edge ¾ of a cm and pin. Run a straight stitch down this fold.
|  |
7. Fold this same edge in again, another ¾ of a cm so that no raw edges are visible. Pin and straight stitch the length of the fold again.
|  |
8. Take your other small rectangle and repeat steps 6 & 7, making sure that if your fabric has a distinct orientation you sew the opposite edge to your original rectangle, as pictured. Not doing this will result in the images of one of your sleeves being upside down!
|  |
9. Take your large rectangle, the book’s outer cover, and lay it right side up. Right sides together, pin your sleeves to the edge of the cover, making sure the folded (hemmed) edges face inwards and that the pattern on the sleeves is running in the same direction as the pattern on the outer cover.
|  |
10. Sew around the top edge, outer edge and bottom edge of the sleeves only, leaving a seam allowance. Make sure you leave the hemmed edge open.
|  |
11. Turn the sleeves out. You should now have a basic slip.
|  |
12. You will notice that at the top and bottom of the sleeve, where it meets the large rectangle, the raw edges of the rectangle are already folding in.
|  |
13. Pin this fold along the length of the top and bottom of the large rectangle. Sew along these lengths with a straight stitch.
|  |
14. Take your exercise book and centre it on your cover.
|  |
15. Using your chalk or vanishing pen mark where the top and bottom of the book sit. This needs to become the top edge of your cover. Fold your fabric along this line, putting a crease in it if possible. Place one pin in the middle to hold the fold in place.
|  |
16. Move along to one of the corners.
|  |
17. Open out the corner, with your thumb on the outside and pointer finger on the inside.
|  |
18. Push the corner inside itself, pushing the corner up and so that it points toward the long sides of the cover.
|  |
19. This is how it should look inside. The short edge of the cover, the part of the sleeve the book goes into should be able to be lifted, unobstructed.
|  |
20. When the sleeve is down the fold should look square as pictured. Pin along the top of this fold. Repeat with remaining corners.
|  |
21. When all corners are pinned insert your exercise book and make sure it fits snugly, adjust the folds as needed until the exercise book fits comfortably. Remove the book.
|  |
22. Stitch along the long edges of the book cover, including the folded sleeves. Don’t worry if a little bit of the fold pokes out like this, it will be covered by your exercise book.
|  |
23. Give your cover another iron before inserting the book cover into the sleeves.
|  |
24. Your cover is now complete! You can embellish your cover with embroidery, ribbons on press studs of you can leave it as it is. The cover is easily removable so you can wash it if it gets grubby. Happy writing!
|  |
Subscribe to:
Posts (Atom)